跳到主要内容位置

vue router: 2 篇

查看所有标签(分类)

vue3+element plus图片预览直接点击按钮就显示图片的预览形式

1 需求#

直接上需求:

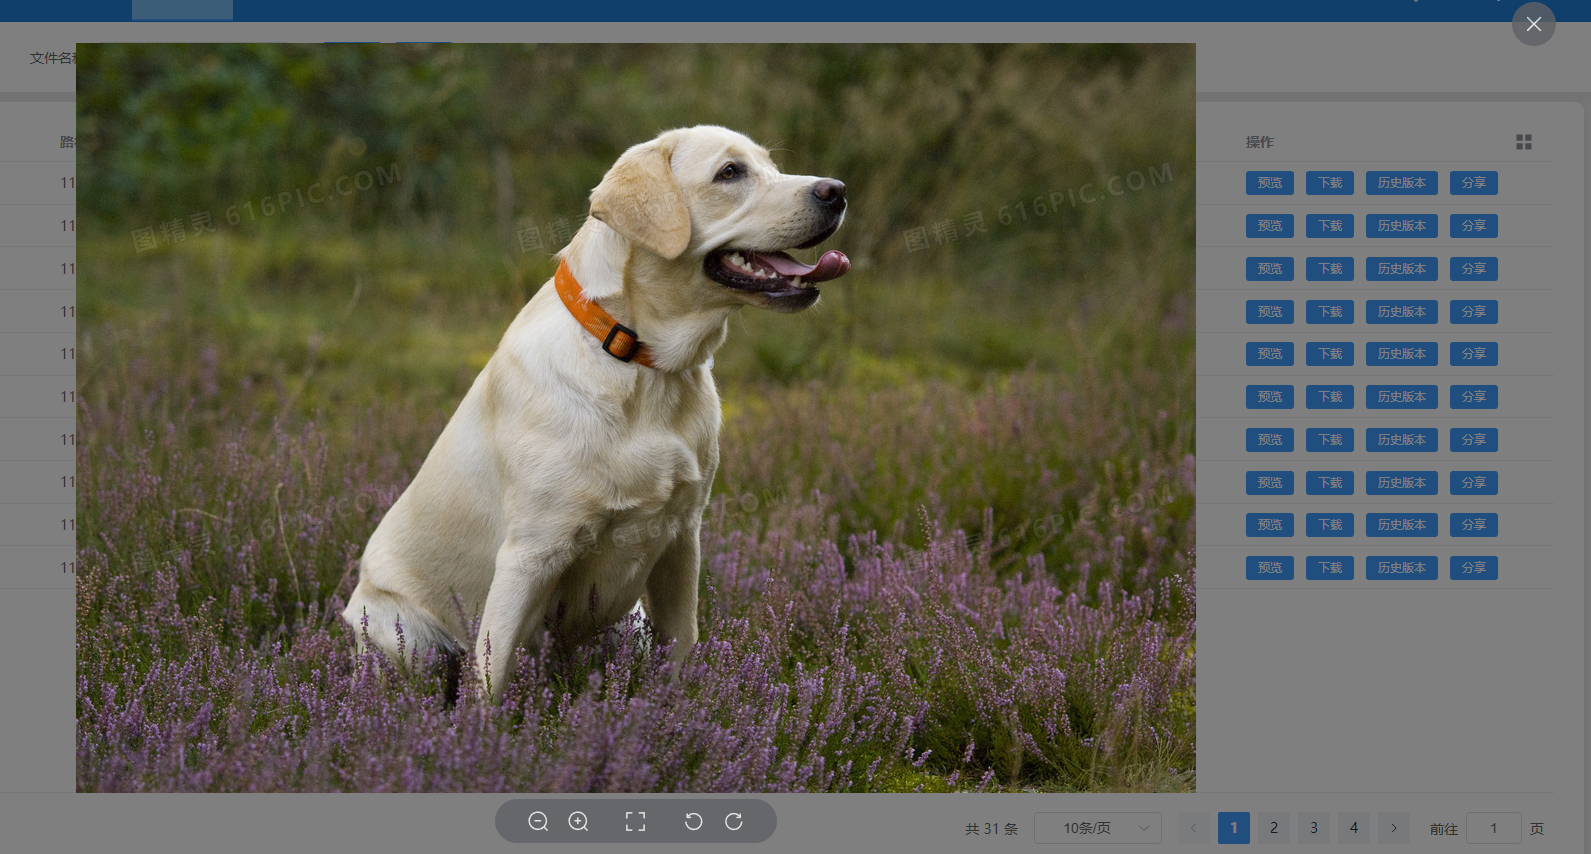
我想要直接点击下面这个“预览”按钮,然后呈现出预览图片的形式

image-20231120090930791

也就是点击完“预览”按钮,会像下面这样:

image-20231120091054028

ok,需求知道了,下面让我们来看看如何实现吧 ~

2 实现#

template 部分

<el-button type="primary" size="small" @click="handlePreview(scope.$index, scope.row)">预览</el-button>
<!-- 图片预览 -->
<el-image-viewer v-if="showImagePreview" :zoom-rate="1.2" @close="closePreview" :url-list="imgPreviewList" />

script 部分

const imgPreviewList = ref < any > []
const showImagePreview = ref(false)
const currentBase64FileData = reactive({
base64: '',
name: ''
})
const handlePreview = async (index: number, row: any) => {
let res = await handleDownload(index, row, true)
currentBase64FileData.base64 = 'data:image/png;base64,' + res?.base64
currentBase64FileData.name = res?.name
showImagePreview.value = true
// 下面数组里可以放一个url,如'https://raw.githubusercontent.com/JACK-ZHANG-coming/map-depot/master/2023image-20231120091054028.png',我这里放的是一个base64数据,也可以用来显示图片
imgPreviewList.value = [currentBase64FileData.base64]
}
const closePreview = () => {
imgPreviewList.value = []
showImagePreview.value = false
}

ok,经过上面简单几句代码,就实现了“点击按钮直接显示图片的预览形式”啦 ~

3 技术小结#

技术栈: vue3+ element plus,其中 vue3 采用的是 script setup 组合式语法的形式。

这部分功能其实在 element plus 官方文档中有写,

https://element-plus.org/zh-CN/component/image.html#image-viewer-api

image-20231120100147616

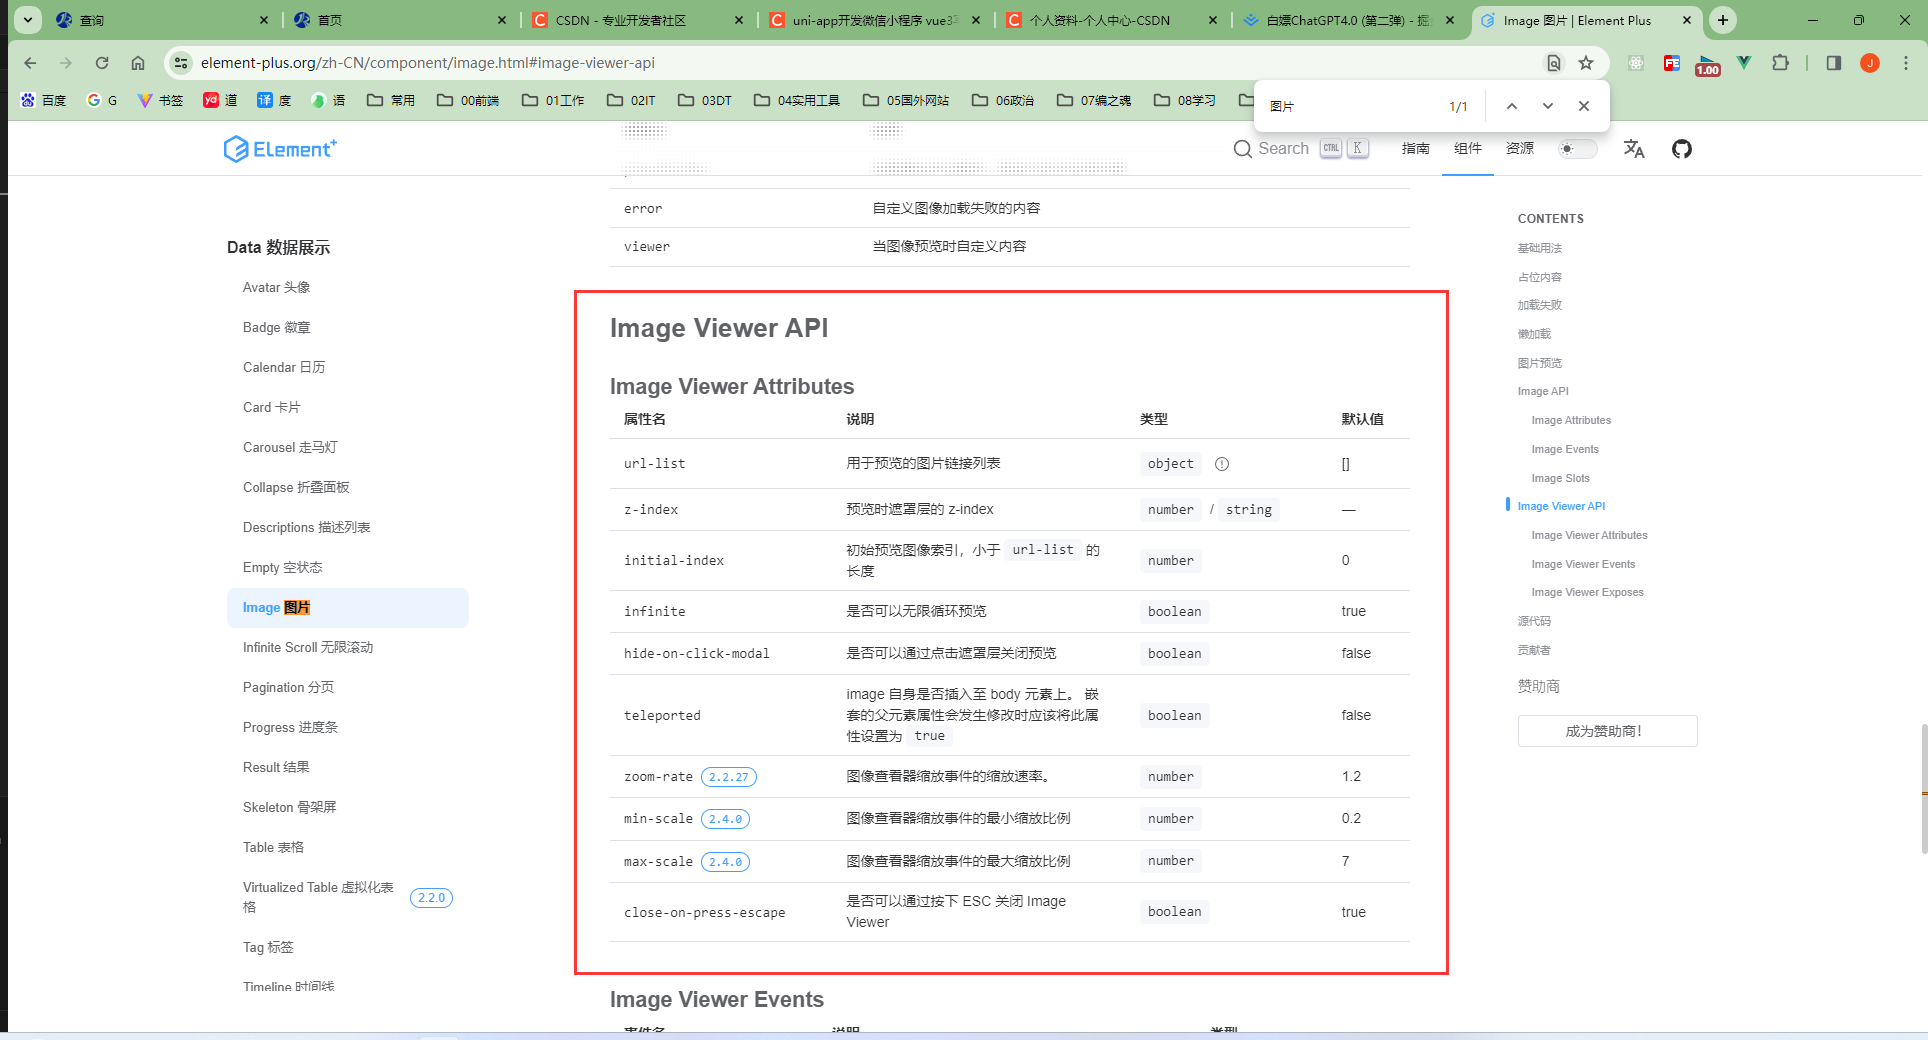
不同的是,这里 element plus 并没有给出实际样例,只是用文字描述了下,咱就是说,家人们,这坑不坑,我还是看了别人的博客才知道这块的用处>_<

Vue3+Vue Router跳转相同路由监听页面刷新并执行某个操作

1 起源#

最近遇到了个这样的需求,大概就是:点击某个按钮,进入某个页面,然后再在这个页面执行某个操作(比如请求某个接口、赋初始值啥的)。

image-20231116163902611

这个需求看似简单,其实也不难。但是,我遇到了个问题,就是当在那个页面点击这个按钮的时候,因为跳转路由路径是一样的原因,页面是不会刷新的,那我怎么判断我是否我是否点击了那个按钮并且跳到了这个页面呢?

于是,我想到了路由传参,通过路由传参的方式,判断这个参数是否变化了,变化了就代表这个路由再次进入了。

2 解决方案#

用 query 的方式传参,参数附上时间戳,这样每进来一次都是不同的参数

点击按钮如下操作:

const router = useRouter()
const goDocumentNotification = () => {
router.push({
path: `/documentNotification`,
query: {
t: Date.now()
}
})
}

在进入的那个页面增加如下代码:

// 使用 watch 监听 route 的变化
watch(
() => route.query.t,
(newPath, oldPath) => {
// 路由变化,执行相应操作
query()
}
)

ok,经过上面的操作便可以在跳转相同路由下,监听页面刷新并执行某个操作啦。

3 知识扩展-关于 Vue Router 路由传参的几种常用方式#

说到这里,vue-router 传参的几种方式也顺便总结一下吧

3.1 params 传参(显示参数)#

浏览器里路由地址显示为这样:

http://127.0.0.1:5190/drs/index.html#/documentNotification/0

声明式:

// 子路由配置 { path: '/documentNotification/:id?', // ?代表这个参数为可传可不传 name: 'documentNotification', component: () => import('@/views/documentNotification/index.vue'), meta: { title: '发放通知', } } // 父路由组件
<router-link :to="/documentNotification/123">进入documentNotification路由</router-link>

编程式:

// 子路由配置
{
path: '/documentNotification/:id?', // ?代表这个参数为可传可不传
name: 'documentNotification',
component: () => import('@/views/documentNotification/index.vue'),
meta: {
title: '发放通知',
}
}
// 父路由编程式传参(一般通过事件触发)
router.push({
path:'/documentNotification/${yourParam}',
})

关于参数的获取:

route.params.id

3.2 params 传参(不显示参数)#

由于从 Vue Router 的 2022-8-22 这次更新后,便不能再用这种方式来写,关于不显示参数的传参,可以参考下面这篇博客:

https://blog.csdn.net/m0_57033755/article/details/129927829

3.3 query 传参#

浏览器里路由地址显示为这样:

http://localhost:3000/#/documentNotification?t=1700140985974

声明式:

//子路由配置
{
path: '/documentNotification',
name: 'documentNotification',
component: () => import('@/views/documentNotification/index.vue'),
meta: {
title: '发放通知'
}
}
//父路由组件
<router-link :to="{name:'documentNotification',query:{t:123}}">进入documentNotification路由</router-link>

编程式:

//子路由配置
{
path: '/documentNotification',
name: 'documentNotification',
component: () => import('@/views/documentNotification/index.vue'),
meta: {
title: '发放通知'
}
}
router.push({
path: `/documentNotification`,
query: {
t: Date.now()
}
})

关于参数的获取:

route.query.t

4 结语#

ok ,就到这里啦,对此你有何看法或想法呢,欢迎提出讨论呀~